Panel 1 edit 4
I really like the main image on the front cover as it shows all of the band members in an interesting light. Its unconventional as the lead singer is not the main focus but I like that as the indie genre is known for breaking the normal conventions as stepping outside the box much like Blur and The Strokes (I have previously blogged on this). Therefore I will not change this image as I have already gained a lot of positive audience feedback on it.
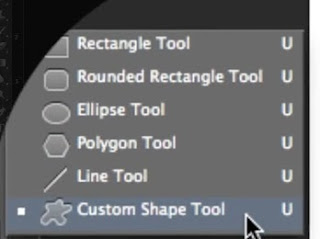 What I have done: I have moved the bonus dvd footage sticker on to the front cover. I have made this my self in photoshop. I simply typed the text and placed it on top of a rounded rectangle which you can create through the round rectangle tool. I then used the eraser tool and played around with it's different brush sizes and types and found one that created a distressed effect. I have now moved this on to the front. In order to do this though I have had to move the Sly Antics text to the left. I used pre-made example of bonus footage stickers to create mine to make it as realistic as possible.
(Tutorial I used)
Next: I may make the Sly Antics text larger as it is indistinguishable as it is so small.


